How Frontier Fiber Installation Works
Getting Frontier Fiber installed in your home is a straightforward process, but understanding each step helps you prepare and ensures the smoothest possible experience. Unlike cable or DSL installations that can reuse existing phone or coax lines, fiber optic installation requires new infrastructure to deliver the high-speed light-based signal to your home.
Frontier has invested heavily in its fiber deployment, and their installation process has been refined over millions of installations nationwide. Here is a step-by-step breakdown of what happens from the moment you place your order to when you're browsing at gigabit speeds.
Step-by-Step Installation Process
Step 1: Order Placement and Scheduling
After placing your Frontier Fiber order online or by calling , you'll receive a confirmation with your installation appointment. Frontier typically schedules installations within 1-2 weeks of ordering, though availability varies by market. You'll choose a 4-hour window for the technician visit, usually between 8 AM and 8 PM on weekdays and Saturdays.
Step 2: Pre-Installation Preparation
Before your appointment, take these steps to speed up the process:
- Identify your ideal router location — Choose a central spot in your home, preferably elevated and away from walls, for the best Wi-Fi coverage.
- Clear access points — The technician needs access to the exterior of your home where the fiber line enters and the interior location where you want the router.
- Check for existing infrastructure — If your home previously had Frontier service, there may already be fiber cabling or an ONT box installed, which can shorten the installation time.
- Ensure someone 18+ is present — An adult must be home for the entire installation to authorize work and sign off on completion.
Step 3: Exterior Work — Running the Fiber Line
The technician begins outside your home by connecting the fiber optic cable from the nearest distribution point (usually a utility pole or underground junction box) to your house. This involves:
- Running the fiber strand along existing utility pathways or through underground conduit
- Attaching the fiber cable to your home's exterior using low-profile mounting clips
- Drilling a small hole (approximately 3/8 inch) through the wall to bring the fiber inside, or using an existing cable entry point
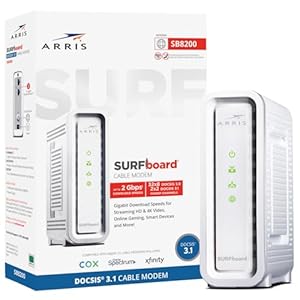
Step 4: ONT Installation
The Optical Network Terminal (ONT) is the critical piece of hardware that converts the fiber optic light signal into an electrical signal your devices can use. The technician mounts the ONT box on your wall, typically near where the fiber cable enters the home. The ONT is roughly the size of a hardcover book and requires a standard power outlet nearby.
The ONT connects to Frontier's fiber network on one side and to your router via an Ethernet cable on the other. It is the bridge between the fiber optic infrastructure and your home network. For more details about the ONT and other hardware, visit our Frontier equipment guide.
Step 5: Router Setup
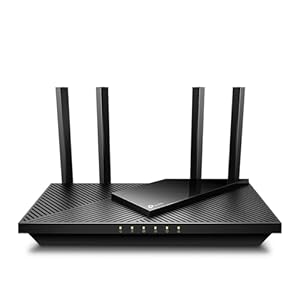
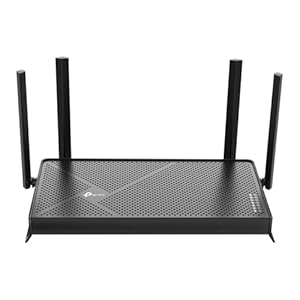
Frontier provides an eero Wi-Fi 6E mesh router as part of most fiber plans. The technician connects the eero to the ONT via Ethernet, powers it on, and verifies it's broadcasting your Wi-Fi network. They'll help you set up your network name (SSID) and password using the eero app on your phone.
Step 6: Testing and Verification
Before leaving, the technician runs speed tests to confirm your connection is delivering the speeds associated with your plan. They'll also verify that multiple devices can connect successfully and that both wired and wireless connections are functioning properly.
Self-Installation Option
In areas where fiber infrastructure is already in place (such as apartments with existing fiber runs or homes with a previous Frontier Fiber installation), Frontier may offer a self-installation option. A self-install kit is shipped to your door and includes:
- An eero Wi-Fi router
- An Ethernet cable
- Step-by-step setup instructions
- Access to phone and chat support during setup
Self-installation typically takes 15-30 minutes and involves connecting the router to the existing ONT, downloading the eero app, and following the on-screen prompts. If you encounter any issues, Frontier's technical support team is available to walk you through troubleshooting or schedule a professional visit at no extra charge.
Apartment and Condo Installation
Installing Frontier Fiber in multi-dwelling units (MDUs) like apartments and condos involves some additional considerations:
- Building permission — Your property management company or HOA must have an agreement with Frontier for fiber service in the building. Check with your landlord or building manager before ordering.
- Existing fiber infrastructure — Many apartment buildings already have fiber run to a central distribution room. Installation in these buildings is faster since the technician only needs to connect from the distribution room to your unit.
- Inside wiring — The technician may need to run a small fiber or Ethernet cable inside the building from the distribution point to your unit. This is usually done through existing conduit or along baseboards.
- Self-install common — Apartments with pre-wired fiber often qualify for self-installation, making the process even simpler.
New Construction Installation
If you're building a new home in an area with Frontier Fiber availability, you can coordinate fiber installation during the construction process. Contact Frontier early in the building process to arrange for fiber conduit to be included in the home's wiring plan. This results in cleaner installations with cabling hidden inside walls and the ONT placed in your preferred location, such as a utility closet or garage.
Installation Timeline
| Phase | Timeline | Details |
|---|---|---|
| Order placement | Day 1 | Online or by phone |
| Scheduling confirmation | 1-3 days | Email/text with appointment window |
| Installation appointment | 7-14 days from order | 2-4 hour on-site visit |
| Speed verification | Same day | Technician tests before leaving |
| Full optimization | 24-48 hours | Network may need time to fully stabilize |
Ready to get started? Check Frontier Fiber Availability or to schedule your installation.
Tips for a Smooth Installation
- Request morning appointments — Earlier slots reduce the chance of delays from previous jobs running long.
- Have your account information ready — Keep your order confirmation number accessible for the technician.
- Test multiple rooms — While the technician is still there, test Wi-Fi signal strength in the rooms where you'll use it most. If coverage is weak in certain areas, ask about adding eero mesh extenders.
- Save the technician's work details — Note where the ONT is mounted, where the fiber enters the home, and where the power source is. This helps with future troubleshooting.
- Download the eero app — Have the eero app installed on your phone before the technician arrives so you can set up your network immediately.
Installation FAQs
How long does Frontier Fiber installation take?
A typical professional installation takes 2-4 hours, depending on whether new fiber needs to be run to the home or existing infrastructure can be used. Self-installations for pre-wired homes take about 15-30 minutes.
Is there a fee for Frontier Fiber installation?
Installation fees vary by market and current promotions. Frontier frequently waives installation fees for new customers, especially during promotional periods. Check the fees and costs page for current details or to ask about waived installation.
Do I need to be home during installation?
Yes, an adult (18 or older) must be present for the entire professional installation. The technician needs interior access to mount the ONT and set up the router, and someone must sign off on the completed work.
Will the technician drill holes in my wall?
In most cases, a small hole (about 3/8 inch) is drilled to bring the fiber cable from the exterior to the interior. The technician will discuss placement options with you and can use existing cable entry points when available to minimize drilling.
Can I choose where the ONT and router are placed?
Yes, you can request preferred locations for both the ONT and router. The technician will work with you to find the best placement, though practical constraints (fiber cable routing, power outlet availability) may influence the final location. Discuss your preferences before work begins.
What if my home already has a Frontier ONT?
If a previous Frontier installation left an ONT in place, the technician can often reuse it, significantly speeding up the installation. The ONT may need a firmware update or replacement if it's an older model, but this is handled on-site at no extra cost.
How long does Frontier Fiber installation take?
Professional installation typically takes 2-4 hours. The technician installs an ONT (Optical Network Terminal) on the outside of your home and connects it to your router inside. Self-installation is available in some areas and takes about 30 minutes.
Is Frontier Fiber installation free?
Frontier often waives installation fees for new customers as a promotional offer. Standard installation fees, when charged, typically range from $75-100. to check current installation promotions.