Getting Frontier Fiber installed at your home is a straightforward process, but knowing what to expect can help you prepare and avoid delays. This guide walks through every step from ordering to activation, including the differences between professional and self-installation, what equipment you receive, how to troubleshoot common issues, and tips from real customer experiences.
Step 1: Check Availability and Order
Before scheduling installation, confirm that Frontier Fiber is available at your address. You can check availability on Frontier’s provider page or by calling Frontier directly at their dedicated sales line.
When you place your order, Frontier will schedule your installation appointment. In most areas, appointments are available within 3–7 business days. During peak demand periods (typically summer months and back-to-school season) or in newly built areas, wait times may extend to 2–3 weeks.
What You Need to Order
- Service address: Frontier verifies fiber availability at the street-level, so apartment or unit numbers matter
- Preferred plan: Choose from Frontier’s speed tiers — 500 Mbps, 1 Gig, 2 Gig, or 5 Gig
- Contact information: Phone and email for appointment confirmation and technician communication
- HOA or landlord approval: If you rent or live in an HOA community, confirm that exterior work (small holes, cable routing) is permitted before scheduling
Frontier’s online ordering process typically takes 10–15 minutes. You’ll receive a confirmation email within one hour with your appointment window and a checklist of preparation steps.
Step 2: Professional Installation vs. Self-Install
Professional Installation (Recommended for New Fiber Connections)
If your home does not already have fiber wiring, a professional installation is required. A Frontier technician will:
- Run fiber from the street to your home: This involves connecting the fiber drop cable from the nearest distribution point (usually a utility pole or underground junction) to the outside of your house. The technician uses a fiber-rated cable that is weather-resistant and UV-protected.
- Install the ONT (Optical Network Terminal): The ONT is a small box (roughly the size of a paperback book) mounted on the interior or exterior wall of your home. It converts the fiber optic signal into an electrical signal that your router can use. Common mounting locations include the garage, basement, or a utility closet near your electrical panel.
- Connect the router: The technician connects an Ethernet cable from the ONT to the included WiFi router, configures the connection, and verifies speeds at multiple points in your home.
- Test the connection: Before leaving, the technician runs speed tests on both wired (Ethernet) and wireless connections to confirm you are receiving the speeds you subscribed to. They will also walk you through the Frontier app for managing your network.
Professional installation typically takes 2–4 hours. The appointment window is usually 4 hours (e.g., 8 AM–12 PM). Installation is free for all new Frontier Fiber customers — there is no installation fee on any plan tier as of March 2026.
Self-Installation (For Homes with Existing Fiber)
If your home already has fiber wiring from a previous Frontier installation, you may qualify for self-installation. Frontier ships a self-install kit that includes:
- WiFi router (model depends on your plan tier — see equipment section below)
- Ethernet cable (Cat 6 for Gig plans, Cat 6A for 2 Gig+)
- Power adapter
- Quick start guide with step-by-step instructions and QR code for video walkthrough
Self-installation takes about 15–30 minutes. Simply connect the router to the existing ONT with the provided Ethernet cable, power it on, and follow the activation steps in the Frontier app or online portal. The kit ships via UPS and typically arrives within 3–5 business days.
Which Option Should You Choose?
| Factor | Professional Install | Self-Install |
|---|---|---|
| Existing fiber wiring | Not required | Required |
| Time to complete | 2–4 hours | 15–30 minutes |
| Cost | Free | Free |
| Technician visit | Yes | No |
| Speed verification | Done by tech | DIY via app |
| Best for | New connections, complex setups | Returning customers, simple setups |
Step 3: Prepare Your Home for Installation
A little preparation goes a long way toward ensuring a smooth, fast installation. Here’s what to do before the technician arrives:
Interior Preparation
- Clear the work area: Remove furniture, boxes, or clutter from the wall where you want the ONT installed. The technician needs about 3 feet of clearance.
- Identify your ideal router location: The router performs best in a central, elevated location away from thick walls and metal objects. A living room shelf or home office desk often works well.
- Ensure a power outlet is nearby: Both the ONT and router need a standard 120V outlet within 6 feet. Avoid using power strips or extension cords for the ONT if possible.
- Secure pets: Technicians work with delicate fiber cables and power tools. Keep pets in a separate room during installation.
Exterior Preparation
- Clear the path from street to house: Trim bushes, move cars from the driveway, and ensure the technician can access the utility pole or ground-level junction box.
- Mark sprinkler lines: If your fiber will be buried underground, mark any sprinkler systems or shallow utility lines with flags.
- Unlock gates: The technician needs access to the side of your home where the fiber will enter.
- Be present for the full appointment: Someone 18+ must be home during the entire installation window. The technician cannot begin work without authorization.
Step 4: What Happens on Installation Day
Here’s a detailed timeline of what to expect during a typical professional Frontier Fiber installation:
Before the Technician Arrives (30 minutes)
You’ll receive a text message or automated call when the technician is en route. This gives you time to prepare the work areas, secure pets, and ensure access points are clear.
Exterior Work (45–90 minutes)
The technician starts outside. They locate the nearest fiber distribution point and run a fiber drop cable to your home. For aerial connections (utility pole), this involves attaching the cable to a mounting bracket on your home’s exterior. For underground connections, the cable may be run through existing conduit or temporarily laid on the surface until a burial crew comes (usually within 2–4 weeks).
A small hole (about 3/8 inch, roughly the diameter of a pencil) is drilled through an exterior wall to route the fiber cable inside. The technician seals the hole with weatherproof silicone caulk. Tip: If you have a preference for the entry point, communicate this to the technician at the start of the appointment — most are happy to accommodate reasonable requests.
Interior Work (30–60 minutes)
Inside, the technician mounts the ONT, connects it to the fiber cable, and runs an Ethernet cable to your router location. They configure the connection through Frontier’s provisioning system, which activates your specific plan speed and account settings.
Testing and Walkthrough (15–30 minutes)
The technician runs wired and wireless speed tests, demonstrates the Frontier app, shows you how to restart the ONT and router if needed, and answers any questions. They’ll also provide a direct number to reach Frontier support if you encounter issues after they leave.
Step 5: Equipment Overview
Frontier provides specific equipment depending on your plan tier. Here’s what you receive as of March 2026:
| Component | 500 Mbps Plan | 1 Gig Plan | 2 Gig / 5 Gig Plan |
|---|---|---|---|
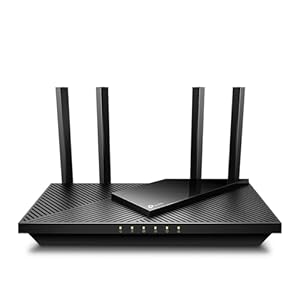
| Router | eero Pro 6E | eero Pro 6E | eero Max 7 |
| WiFi Standard | Wi-Fi 6E | Wi-Fi 6E | Wi-Fi 7 |
| WAN Port | 1 GbE | 1 GbE | 10 GbE |
| Mesh Capable | Yes (add-on) | Yes (add-on) | Yes (add-on) |
| Monthly Fee | Included | Included | Included |
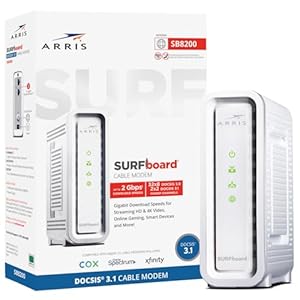
ONT (Optical Network Terminal) Details
The ONT is the heart of your fiber connection. Frontier currently deploys the Nokia/Alcatel-Lucent ONT for most residential installations. Key specs:
- Dimensions: Approximately 9″ x 6″ x 2″
- Power: 12V DC adapter (included), draws about 15 watts
- Ports: 1 GbE or 10 GbE Ethernet (depending on plan), coax output (legacy, typically unused)
- Battery backup: Optional 8-hour battery backup available for $10/month (provides power to ONT only, not your router)
Can You Use Your Own Router?
Yes. Frontier supports BYOD (bring your own device). You can connect any router with an appropriate WAN port to the ONT via Ethernet. For plans above 1 Gbps, you need a router with a 2.5 GbE or 10 GbE WAN port to take full advantage of the speed. Popular compatible routers include the TP-Link Archer BE800 and ASUS RT-BE96U.
Step 6: Activation and Speed Verification
Once the hardware is connected, activation typically happens automatically within 5–10 minutes. Here’s how to verify everything is working correctly:
Wired Speed Test
- Connect a laptop or desktop directly to the router via Ethernet cable
- Open speedtest.net or use the Frontier app’s built-in speed test
- Run 3 tests at different times and average the results
- You should see 90–100% of your plan speed on a wired connection
Wireless Speed Test
- Connect to the 5 GHz or 6 GHz band (not 2.4 GHz) for best results
- Stand within 15 feet of the router with clear line of sight
- Expect 50–80% of your plan speed on wireless, depending on device capability
- If speeds are significantly lower, try relocating the router or check for interference
What to Do If Speeds Are Low
If your speed test results are significantly below expectations:
- Restart the ONT by unplugging it for 30 seconds, then plugging it back in (wait 3–5 minutes for it to fully restart)
- Restart the router the same way
- Check that your device supports the plan speed (older devices may not reach gigabit)
- Contact Frontier support — they can remotely check ONT signal levels and provision settings
Troubleshooting Common Installation Issues
No Internet Light on ONT
If the ONT’s internet indicator is off or red after installation:
- Verify the fiber cable is fully seated in the ONT’s fiber port (you should hear a click)
- Check that the ONT has power (green power light should be on)
- Wait 10 minutes — initial provisioning can take time
- Call Frontier at 1-800-921-8101 for a remote diagnostic check
WiFi Connected But No Internet
This usually means the ONT is online but the router is not communicating properly:
- Check the Ethernet cable between the ONT and router — make sure it is firmly plugged into the WAN port (not a LAN port)
- Power-cycle the router (unplug 30 seconds, plug back in)
- If using your own router, confirm it is set to DHCP (automatic IP) on the WAN interface
Slow Speeds on WiFi Only
If wired speeds are fine but WiFi is slow:
- Move the router to a more central location in your home
- Switch devices to the 5 GHz or 6 GHz band
- Check for interference from microwaves, baby monitors, or neighboring WiFi networks
- Consider adding an eero mesh extender ($10/month from Frontier or purchase your own)
Underground Fiber Cable Exposed
If the technician laid the fiber cable on the surface rather than burying it, this is normal. A burial crew is scheduled separately, usually within 2–4 weeks. In the meantime, avoid mowing directly over the cable and mark its location with flags or stakes.
Pro Tips for a Smooth Installation
- Request a specific ONT location: Tell the technician where you want it before they start drilling. Moving it later requires a service call.
- Take photos: Photograph the ONT model number, serial number, and the location of the exterior fiber entry point. These are helpful for future troubleshooting.
- Test every room: Walk through your home and test WiFi in each room while the technician is still present. If coverage is poor in certain areas, they can recommend mesh extender placement.
- Ask about conduit: If the fiber cable runs through conduit, it’s protected from damage. If not, ask if conduit can be installed — especially for underground runs.
- Save the technician’s direct number: Many leave a callback number. If you have an issue within 24–48 hours, reaching them directly can be faster than calling general support.
- Set up the Frontier app immediately: The app lets you manage your network, run speed tests, pause devices, and contact support from your phone.
- Label your cables: If you have multiple Ethernet runs, label each one at both ends for easy identification later.
Installation Costs and Fees
Frontier has simplified its fee structure for fiber installations. Here’s what you can expect as of March 2026:
| Item | Cost | Notes |
|---|---|---|
| Standard installation | Free | Included with all new fiber plans |
| Self-install kit | Free | Shipped via UPS, 3–5 business days |
| Router (included) | $0/mo | eero Pro 6E or eero Max 7 depending on plan |
| Mesh extender | $10/mo each | Optional, recommended for homes over 2,500 sq ft |
| Battery backup | $10/mo | Optional 8-hour backup for the ONT |
| Inside wire maintenance | $7/mo | Optional plan covering interior wiring repairs |
| Technician visit (after install) | $75 | Waived if issue is on Frontier’s side |
There are no activation fees, no equipment deposits, and no early termination fees with Frontier Fiber. All plans are contract-free.
How Frontier Fiber Installation Compares to Other Providers
Installation experiences vary significantly across fiber providers. Here’s how Frontier stacks up:
| Feature | Frontier Fiber | AT&T Fiber | Verizon Fios | Google Fiber |
|---|---|---|---|---|
| Installation cost | Free | Free (waived online) | Free | Free |
| Self-install option | Yes | Yes | Yes | Yes |
| Typical wait time | 3–7 days | 3–10 days | 3–7 days | 1–3 weeks |
| Pro install duration | 2–4 hours | 2–4 hours | 2–4 hours | 1–3 hours |
| Router included | Yes (eero) | Yes (BGW320) | Yes (G3100) | Yes (Nest) |
| BYOD supported | Yes | Partial | Yes | Yes |
| Contract required | No | No | No | No |
Frontier’s installation process is competitive with the major fiber providers. The free eero router is a standout advantage, as AT&T and Verizon provide less capable default routers. Frontier also has one of the most BYOD-friendly setups, with simple DHCP configuration and no gateway bypass required.
Frequently Asked Questions
How long does Frontier Fiber installation take?
Professional installation takes 2–4 hours for new connections. Self-installation for homes with existing fiber wiring takes 15–30 minutes. The appointment window is typically 4 hours to account for variability in exterior work.
Is Frontier Fiber installation really free?
Yes. As of March 2026, all Frontier Fiber plans include free professional installation with no activation fees, equipment deposits, or contracts. This applies to both new and returning customers.
Can I use my own router with Frontier Fiber?
Yes. Frontier fully supports BYOD (bring your own device). Connect any router to the ONT via Ethernet. For plans above 1 Gbps, you need a router with a 2.5 GbE or 10 GbE WAN port to take full advantage of the speed. Check our best Wi-Fi 7 routers guide for compatible options.
What if Frontier Fiber is not available at my address?
Check our Frontier coverage expansion guide to see if your area is scheduled for upcoming fiber deployment. Frontier is actively expanding to 10 million fiber-passable homes by end of 2026. You can also explore other internet providers available in your area.
Does installation require drilling?
In most cases, yes. A small hole (about 3/8 inch, roughly the diameter of a pencil) is drilled through an exterior wall to route the fiber cable inside. The technician seals the hole with weatherproof silicone caulk. If you have a preference for the entry point, communicate this to the technician at the start of the appointment. In rare cases, existing cable or phone line entry points can be reused.
What happens if the technician can’t complete the installation?
Occasionally, unexpected issues arise — buried utilities, HOA restrictions, or the need for additional construction. In these cases, Frontier schedules a follow-up appointment (usually within 1–2 weeks) and coordinates with their construction team. You are not charged for incomplete installations.
Can I get Frontier Fiber in an apartment or condo?
Yes, if the building is fiber-equipped. Many apartment complexes and condos in Frontier’s service area already have fiber wiring to individual units. Contact your property manager to confirm, or check availability by entering your address on Frontier’s provider page.
Do I need to be home during installation?
Yes. Someone 18 or older must be present for the entire professional installation appointment. The technician needs access to both the exterior and interior of your home and requires your authorization before drilling or mounting equipment.
Last updated: March 2026. Installation process may vary by location. Visit Frontier’s provider page for current information.
Sources & Methodology
This article uses data from FCC Broadband Data Collection reports, U.S. Census Bureau demographics, and verified provider pricing and plan information. Pricing, speeds, and availability are verified against provider broadband nutrition labels and may vary by location. For a detailed explanation of our data collection and scoring process, see our methodology page.
Data Sources
- FCC Broadband Data Collection
- U.S. Census Bureau American Community Survey
- USAC Universal Service Fund
- NTIA Internet Use Survey
Last verified: March 2026. InternetProviders.ai is an independent resource. We may earn commissions from partner links — this does not affect our editorial recommendations. See our methodology for details.