Setting up a home network does not require technical expertise. Whether you just signed up for internet service or are upgrading your existing setup, this step-by-step guide walks you through the entire process—from connecting your modem to securing your WiFi network.
By the end, you will have a fast, secure home network that covers every room in your house.
What You Need Before Starting
Gather the following equipment before beginning your setup:
- Modem: Provided by your ISP or purchased separately (cable, DSL, or fiber ONT)
- Router: Standalone router or modem-router combo unit
- Ethernet cables: At least 2 (one for modem-to-router, one for testing)
- Coaxial cable or fiber line: Already installed by your ISP to the wall jack
- A device: Smartphone, laptop, or tablet for WiFi configuration
If you are unsure whether to buy your own modem and router or use your ISP’s equipment, check our guide on the best modem-router combos for recommendations.
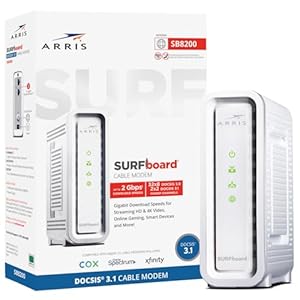
Step 1: Set Up Your Modem
Your modem is the bridge between your ISP’s network and your home. It converts the incoming signal (cable, DSL, or fiber) into a format your router can use.
Connecting the Modem
- Connect the coaxial cable (for cable internet) or ethernet cable (for fiber ONT) from the wall jack to the modem’s input port
- Plug the modem’s power adapter into a wall outlet
- Turn the modem on and wait 2–5 minutes for it to fully boot up
- Watch the indicator lights: the “Online” or “Internet” light should turn solid (not blinking) when the connection is established
If the online light continues blinking after 10 minutes, your ISP may need to activate the modem. Call their support line with your modem’s MAC address (printed on a sticker on the device) to complete activation.
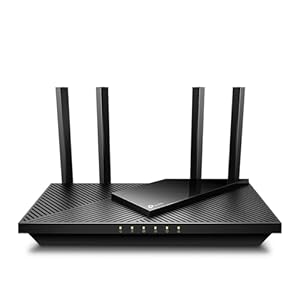
Step 2: Connect Your Router
The router creates your local network and broadcasts the WiFi signal that your devices connect to.
- Connect an ethernet cable from the modem’s ethernet output port to the router’s WAN (or Internet) port—this port is usually a different color from the other ports
- Plug the router’s power adapter into a wall outlet
- Turn the router on and wait 1–3 minutes for it to boot
- The router’s WiFi and Internet indicator lights should both turn solid
Router Placement Tips
Where you place your router significantly affects WiFi coverage and speed:
- Central location: Place the router in the center of your home, not in a corner or closet
- Elevated position: Set it on a shelf or mount it on a wall, not on the floor
- Away from interference: Keep it away from microwaves, baby monitors, and thick walls or metal objects
- Open area: Avoid enclosed cabinets or behind furniture
Step 3: Configure Your WiFi Network
Your router broadcasts a default WiFi network with a name (SSID) and password printed on a sticker on the device. Connect to this default network first, then customize your settings.
Accessing Router Settings
- Connect to the router’s default WiFi network (or connect via ethernet cable)
- Open a web browser and type your router’s admin address (commonly 192.168.1.1 or 192.168.0.1—check the sticker on your router)
- Log in with the default admin username and password (also on the sticker)
- The setup wizard should launch automatically on first login
Setting Your WiFi Name and Password
Change the default network name and password for security and convenience:
- Network name (SSID): Choose something you will recognize but that does not reveal personal information (avoid using your name or address)
- Password: Use at least 12 characters with a mix of letters, numbers, and symbols. This is the password guests and your devices will use to connect
- Security type: Select WPA3 if available, or WPA2 as a minimum. Never use WEP—it is outdated and easily compromised
If your router supports both 2.4 GHz and 5 GHz bands, you can use the same network name for both. Most modern routers automatically steer devices to the optimal band.
Step 4: Connect Your Devices
With your WiFi network configured, connect your devices:
WiFi Devices
On each device (phone, tablet, laptop, smart TV), go to WiFi settings, find your network name, and enter your password. The device will save the password for future automatic connections.
Ethernet Devices (Recommended for Gaming and Streaming)
For the fastest and most stable connections, use ethernet cables for devices that stay in one place:
- Desktop computers: Always use ethernet when possible
- Gaming consoles: Ethernet eliminates WiFi latency spikes that cause lag
- Streaming devices: 4K streaming is more reliable over ethernet
- Smart TVs: Most have an ethernet port on the back
Connect an ethernet cable from the device to one of the numbered LAN ports on your router (not the WAN port). The connection is automatic—no configuration needed.
Step 5: Secure Your Network
A few basic security steps protect your network from unauthorized access and keep your devices safe.
Change the Router Admin Password
The admin password (used to access router settings) is different from your WiFi password. Default admin credentials are publicly known for every router model. Change this immediately:
- Log in to your router’s admin panel
- Navigate to Administration or System settings
- Change the admin password to something strong and unique
- Write it down and store it in a safe place
Enable WPA3 Encryption
WPA3 is the latest WiFi security standard. If your router supports it, enable it in the wireless security settings. If your older devices cannot connect with WPA3, use WPA2/WPA3 mixed mode.
Set Up a Guest Network
Most modern routers support a separate guest network. This lets visitors use your internet without accessing your main network and connected devices:
- Go to your router’s wireless settings
- Enable the guest network
- Set a different password from your main network
- Disable guest access to local network resources
Keep Firmware Updated
Router manufacturers release firmware updates that fix security vulnerabilities and improve performance. Check your router’s admin panel for update options, and enable automatic updates if available.
Step 6: Optimize Your Network
Once everything is connected and secure, optimize for the best performance.
WiFi Channel Selection
If your WiFi seems slow despite a good internet plan, neighboring networks may be interfering on the same channel. In your router’s wireless settings, try switching from “Auto” channel selection to a specific channel (1, 6, or 11 on the 2.4 GHz band are non-overlapping). Many routers have a channel scanner that shows which channels are least congested.
Quality of Service (QoS)
QoS settings let you prioritize traffic for certain devices or applications. If video calls drop out when someone else is streaming, enable QoS and set your work computer or video conferencing traffic as high priority.
Extending Coverage
If your WiFi does not reach every room, you have several options. Read our comparison of mesh WiFi vs. range extenders to find the right solution for your home layout.
For more WiFi optimization strategies, see our guide on how to improve your WiFi signal.
Troubleshooting Common Setup Issues
No Internet Connection After Setup
- Verify the modem’s online light is solid (if blinking, the ISP connection is not established)
- Ensure the ethernet cable runs from the modem to the router’s WAN port, not a LAN port
- Restart both the modem and router: unplug both for 30 seconds, plug in the modem first, wait 2 minutes, then plug in the router
WiFi Connected but Slow
- Move closer to the router to test if distance is the issue
- Check if many devices are streaming or downloading simultaneously
- Switch to the 5 GHz band for faster speeds at shorter range
- Run a speed test at the router (via ethernet) to verify your ISP is delivering expected speeds
Devices Cannot Find the Network
- Verify the router’s WiFi is enabled (check indicator lights)
- Make sure SSID broadcast is enabled in router settings
- If you recently changed the network name, devices will need to reconnect manually
Frequently Asked Questions
Do I need both a modem and a router?
Yes, unless you have a modem-router combo (also called a gateway). The modem connects to your ISP, and the router creates your local network and WiFi. Fiber internet users typically have an ONT (installed by the ISP) plus a separate router.
Should I buy my own modem and router or rent from my ISP?
Buying your own equipment typically saves money within 6–12 months since ISP rental fees run $10–$15/month. Your own equipment also gives you more control over settings and performance. However, ISP-provided equipment is guaranteed compatible and often easier to troubleshoot with their support team.
How often should I restart my router?
There is no need to restart regularly if your router is working well. However, if you experience slowdowns or connectivity issues, a restart (unplug for 30 seconds, then plug back in) often resolves temporary problems. Keeping firmware updated reduces the need for restarts.
What is the difference between 2.4 GHz and 5 GHz WiFi?
The 2.4 GHz band provides wider coverage and better wall penetration but slower maximum speeds. The 5 GHz band offers faster speeds but shorter range. Most modern routers broadcast both simultaneously. Use 5 GHz for nearby devices that need speed (laptops, streaming devices) and 2.4 GHz for distant or smart home devices.
How many devices can a home network handle?
Most consumer routers support 20–50 simultaneous device connections without issues. The limiting factor is usually your internet bandwidth, not the router’s capacity. If you have many smart home devices (cameras, thermostats, lights), a mesh system or higher-end router helps maintain performance.
Can I set up a wired home network without WiFi?
Yes. You can use only ethernet connections by disabling the router’s WiFi radio in settings. This is uncommon for homes but provides the most secure and fastest network. Most households use a mix of wired and wireless connections.
Advanced Home Network Setup: Beyond the Basics
Once you have the fundamentals in place — a modem, router, and WiFi network — there are several additional steps you can take to optimize performance, security, and coverage throughout your home.
Wired Backbone: Ethernet for Critical Devices
While WiFi is convenient, a wired Ethernet connection provides the fastest, most reliable speeds for devices that need consistent performance. Running Ethernet cables to the following devices will significantly improve your network experience:
- Desktop computers and work-from-home setups — Eliminates WiFi interference for video calls and large file transfers
- Gaming consoles — Reduces latency and eliminates packet loss for smoother online gameplay
- Smart TVs and streaming devices — Prevents buffering during 4K HDR streaming
- Network-attached storage (NAS) — Maximizes transfer speeds for file access and backups
If running Ethernet cables through walls is not practical, powerline adapters offer an alternative by using your home's electrical wiring to transmit network data. Modern powerline adapters support speeds up to 2 Gbps, though real-world performance typically reaches 200-400 Mbps depending on your home's electrical wiring quality.
Mesh WiFi Systems: When to Upgrade
If your single router cannot cover your entire home with a strong WiFi signal, a mesh WiFi system is the best solution. Mesh systems use multiple access points (nodes) that communicate with each other to create seamless coverage throughout your home. Here is when to consider upgrading:
- Home is larger than 1,500 sq ft — A single router typically covers 1,000-1,500 sq ft effectively
- Multiple floors — WiFi signals weaken significantly through floors (especially concrete)
- Dead zones exist — Any room where WiFi is consistently weak or drops
- You have 15+ connected devices — Mesh systems distribute device load across multiple nodes
Many ISPs now offer their own mesh solutions: AT&T's Smart WiFi Extenders, Xfinity's xFi Pods, and Spectrum's WiFi extenders. These integrate seamlessly with their provided gateways but typically cost $5-$10/mo per unit. Third-party mesh systems from manufacturers like Eero, Google Nest WiFi, or TP-Link Deco offer better performance at a one-time cost.
Securing Your Home Network
A properly secured network prevents unauthorized access and protects your connected devices. Follow these steps:
- Change the default admin password — Your router's admin panel is typically accessed at 192.168.1.1 or 192.168.0.1. Change the default login credentials immediately to prevent unauthorized configuration changes.
- Use WPA3 encryption — If your router supports WPA3, enable it. Otherwise, use WPA2-AES as the minimum. Never use WEP or WPA-TKIP, which are easily compromised.
- Create a guest network — Set up a separate WiFi network for visitors and IoT devices. This isolates these devices from your main network where sensitive data (computers, NAS) resides.
- Enable automatic firmware updates — Router manufacturers regularly release security patches. Enable automatic updates, or check for updates monthly.
- Disable WPS — WiFi Protected Setup (WPS) has known vulnerabilities. Disable it in your router settings and use the WiFi password instead.
Network Speed by Activity: How Much Do You Need?
| Activity | Minimum Speed | Recommended Speed | Per Device |
|---|---|---|---|
| Web browsing | 5 Mbps | 25 Mbps | Per device |
| SD video streaming | 3 Mbps | 10 Mbps | Per stream |
| HD video streaming | 5 Mbps | 25 Mbps | Per stream |
| 4K video streaming | 25 Mbps | 50 Mbps | Per stream |
| Video conferencing | 10 Mbps up/down | 25 Mbps up/down | Per call |
| Online gaming | 25 Mbps | 50 Mbps | Per console |
| Smart home devices | 1 Mbps | 5 Mbps | Per device |
Frequently Asked Questions
Do I need a modem and a router, or can I use one device?
You can use either a separate modem and router or a combined gateway device. Most ISPs provide a gateway that combines both functions — AT&T, Xfinity, and Spectrum all include combo devices. Using separate devices gives you more control and flexibility to upgrade each component independently, but a single gateway is simpler to manage.
How many devices can my home network support?
Most modern routers can technically connect 30-50 devices simultaneously. However, performance degrades as more devices compete for bandwidth. A 300 Mbps plan with 20 active devices gives each device an average of 15 Mbps. For households with 15+ devices, consider a plan of 500 Mbps or higher and a WiFi 6 router that handles multiple simultaneous connections more efficiently.
Should I use the ISP's router or buy my own?
Buying your own router is usually the better long-term investment. ISP-provided routers often lack advanced features and may cost $5-$14/mo in rental fees. A quality WiFi 6 router costs $80-$200 and pays for itself within 6-18 months. However, some ISPs (like AT&T Fiber) include the gateway at no extra charge, making the included equipment a reasonable choice.
What is the difference between 2.4 GHz and 5 GHz WiFi?
The 2.4 GHz band covers a larger area and penetrates walls better but offers slower speeds (up to ~150 Mbps). The 5 GHz band offers faster speeds (up to ~1 Gbps) but with shorter range. Most modern routers use both bands simultaneously and automatically connect devices to the optimal band.
For help choosing an internet plan to power your home network, see our quick internet selection guide. If you need a new router, check our best modem-router combos guide. For WiFi troubleshooting, read our WiFi signal improvement guide.
Sources & Methodology
This article uses data from FCC Broadband Data Collection reports, U.S. Census Bureau demographics, and verified provider pricing and plan information. Pricing, speeds, and availability are verified against provider broadband nutrition labels and may vary by location. For a detailed explanation of our data collection and scoring process, see our methodology page.
Data Sources
- FCC Broadband Data Collection
- U.S. Census Bureau American Community Survey
- USAC Universal Service Fund
- NTIA Internet Use Survey
Last verified: March 2026. InternetProviders.ai is an independent resource. We may earn commissions from partner links — this does not affect our editorial recommendations. See our methodology for details.